100 Top Tips: Microsoft Excel
Power up your Microsoft Excel skills with this powerful pocket-sized book of tips that will save you time and help you learn more from your spreadsheets.
06 March 2015
Thanks to TechnologyWillSaveUs, my Code Club had a set of DIY Gamer Kits to assemble and solder, which we recently did in a half-day session in the school hall. The guide says it'll take about an hour and a half to assemble, but it took me a bit longer than that, and for the children it was the first time they'd done any soldering. We found that half a day was the right amount of time to set aside for it, including introducing the children to soldering and ensuring we worked at a steady but safe pace.
The DIY Gamer Kit is an Arduino-based handheld games console that has an 8x8 pixel matrix display, four control buttons, a light sensor and infrared communications. It uses a standard 9V battery for power. When you get it, it comes in kit form, as a white circuit board and components that need to be soldered to it. The Arduino clips to the underside of the board, and there are plastic coverings that screw to the front and back.

The DIY Gamer's board, onto which the components are soldered and fixed
One of our main concerns was to make sure that the children were safe using the soldering irons. The teacher told me that they routinely warn children that the glue guns are hot and they shouldn't get any glue on them, and some children immediately test that by putting a dollop on their hand, which then blisters. Given how much hotter the soldering irons are, we couldn't run any similar risks, so the teacher began by giving the group a serious talk about safety. They were excited and we wanted to tap into that enthusiasm, but also needed to ensure that everyone proceeded carefully and safely at all times. During the session, nobody was hurt, and everyone had a good time.
The other thing we did was to separate the soldering tables and to restrict the number of people there at any one time. We had a table for each kit where the components were kept, and when something was ready for soldering, the children went over to the soldering station on the other side of the hall. That ensured there wasn't any bustling around the soldering station.
Before we got into the kits properly, we did a practice solder session using some bits of old wire. We gave everyone a chance to try soldering the wires together, so they could see how it was going to work, get a feel for the solder and the soldering iron, and gain confidence before they were using the kits. We divided the group in two for this, and while one half was soldering, the other half was using a card game to learn what the different bits of the kit did.

At the solder station
When assembling the kit, we used the manual but found we had to make a few changes to the process. Some of the components were pre-soldered on our board (which was a huge time saver, without detracting from the experience). I found that I had to do section 7 of the manual (integrated circuits) before fitting the LED display (section 5), otherwise the display gets in the way. We put together an A5 booklet based on the manual, but changed the order of some of the sections and excluded some others to fit the kits we had. When it came to fitting the integrated circuits, I didn't know which way they should go in, but my friend Marcus (who also gave me a soldering refresher class when I was preparing the session) told me you match the semicircle shapes on the chips with the semicircle shapes on the sockets.
The session went extremely well. "This is like the best science lesson ever!" one of the children said, and there was much excitement when they switched the kits on and found they could play Snake. Out of our kits, only a couple didn't work. On one of them, the children had soldered two resistors in the wrong places and we haven't been able to get them off yet. Unfortunately, these were by far the best soldered joints of the whole session! For the other kit, we haven't worked out why it's not working, but we'll take a look and check it. Given the complexity of the kit and the inexperience of the children, we were very happy with the outcome, and everyone got to play a game and experience building the kit.

The finished DIY Gamer Kit, playing a game of Snake
For the next step, we'll be programming them, but the school is also now exploring more opportunities to do electronics projects following the success of this session, and the enthusiasm of the children for it.
The DIY Gamer Kit has recently been nominated as a design of the year at the Design Museum, and it is a great device. I took it along to the Raspberry Pi Birthday Party to demonstrate, and it was a popular exhibit. If you're looking for a fun soldering project and a first Arduino project, it's well worth taking a look at it.
Thank you to everyone who made this possible, including TechnologyWillSaveUs, Code Club, Marcus, and the teachers and facilities manager who helped run the session.
I'm sure the children will remember the day they got to build a games console for a long time.
Permanent link for this post | Blog Home | Website Home | Email feedback
© Sean McManus. All rights reserved.
Visit www.sean.co.uk for free chapters from Sean's coding books (including Mission Python, Scratch Programming in Easy Steps and Coder Academy) and more!
Power up your Microsoft Excel skills with this powerful pocket-sized book of tips that will save you time and help you learn more from your spreadsheets.
This book, now fully updated for Scratch 3, will take you from the basics of the Scratch language into the depths of its more advanced features. A great way to start programming.
Code a space adventure game in this Python programming book published by No Starch Press.
Discover how to make 3D games, create mazes, build a drum machine, make a game with cartoon animals and more!
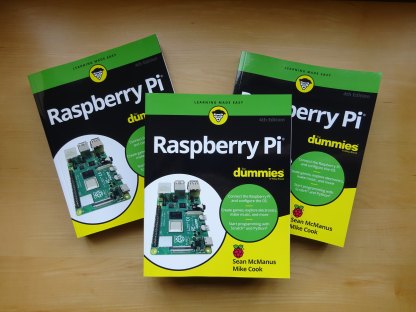
Set up your Raspberry Pi, then learn how to use the Linux command line, Scratch, Python, Sonic Pi, Minecraft and electronics projects with it.
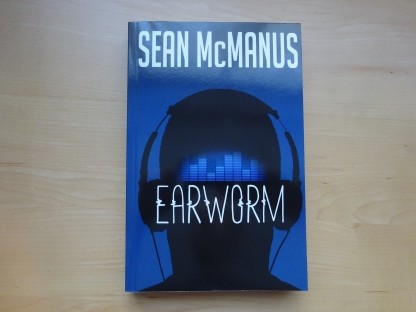
In this entertaining techno-thriller, Sean McManus takes a slice through the music industry: from the boardroom to the stage; from the studio to the record fair.
![]() Top | Search | Help | Privacy | Access Keys | Contact me
Top | Search | Help | Privacy | Access Keys | Contact me
Home |
Newsletter |
Blog |
Copywriting Services |
Books |
Free book chapters |
Articles |
Music |
Photos |
Games |
Shop |
About